Showing posts with label cricut. Show all posts

Saturday, March 22, 2014

New Handmade Cards

Last weekend I attended a baby shower and a wedding shower.  My brother is expecting a baby and my step-brother is getting married.  Fun times in the family!  Of course I made cards to go along with my gifts for each shower.

Here is the baby shower card I made.  I used my cricut to cut out the onsie shape.  I merged together the same shape with one upside down so that the onsie would open.  Then I mounted it on a cardstock base embellished with washi tape and ink.  It was simple yet cute.  I also used my envelope punch board to make a matching envelope out of patterened paper.
Here is the card I made for the wedding shower.  I used my cricut again to cut out a scalloped circle as the base for my wedding dress skirt and a heart as the top of the wedding dress.  I also cut out the "Congratulations" using the Calligraphy Collection cartridge.  I used a peacock feather patterned paper because peacocks are their wedding color scheme and theme.

I also made a card to encourage my friend Jodie who is a full time missionary in Tijuana, Mexico.  She works with children at risk and survivors of human trafficking.  She spreads the words, love and encouragement of God.  You can check out her blog and learn more about her missionary here.

I really loved this little card.  It was one of the first things I made using the Texture Boutique I got for Christmas.  Birds are a favorite "symbol" of mine to work with.  They signify so much in terms of freedom and soaring to reach goals.  I hope she enjoyed the card and felt the love coming to her from my craft room and heart. 


Friday, October 18, 2013

Halloween Decor

I made a very simple Halloween wreath last year and I was excited to get it out again this year to hang on the front door.  I saw something similar on Pinterest and made it my own.  Very easy, quick and simple.
This year I made a little framed word art for the entry way table.  This was made with free cuts on my Cricut and some added washi tape and patterned paper.  I used a dollar store black frame and a metal frame easel from Michaels.  Again very easy and simple.


Saturday, February 16, 2013

Crafty Decor For My Craft Room

Last year I decided it was time to spruce up my craft room.  I am beyond lucky to have this little space in our basement.  A whole room with a door.  It is my own little hide out.  When I first decided it would be my craft room I had my husband paint it purple, he calls it plum crazy purple, but I still like the color 7 years later.  It has an old desk I rescued from a neighbors curb, an old cabinet we had in our kitchen at our last house and a hodge podge of other storage units.  It's not exactly Pottery Barn in there, but it works for me.

I took down all the preschool coloring pages and crafts my son had made and taped to my walls and created a few things to hang.

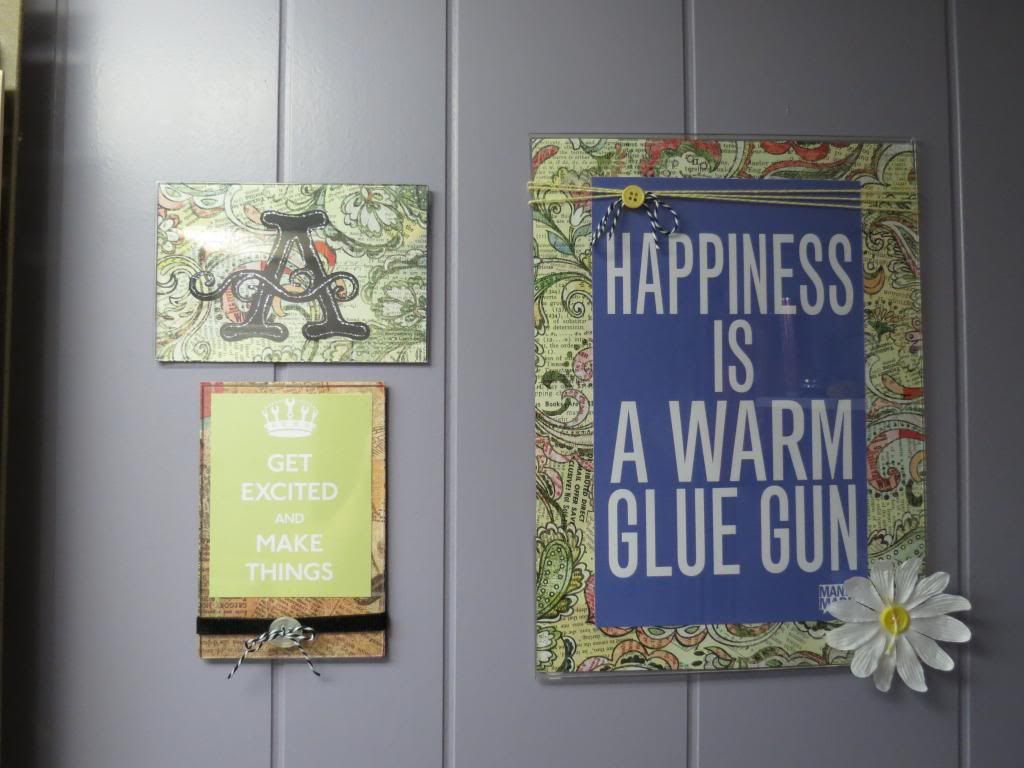
First up were these little gems made with scrapbook paper, free printables from online, ribbon, twine, buttons and a paper flower.  I used that blue tacky poster hanging stuff to stick them to the wall, they are just light enough to be held up by it.

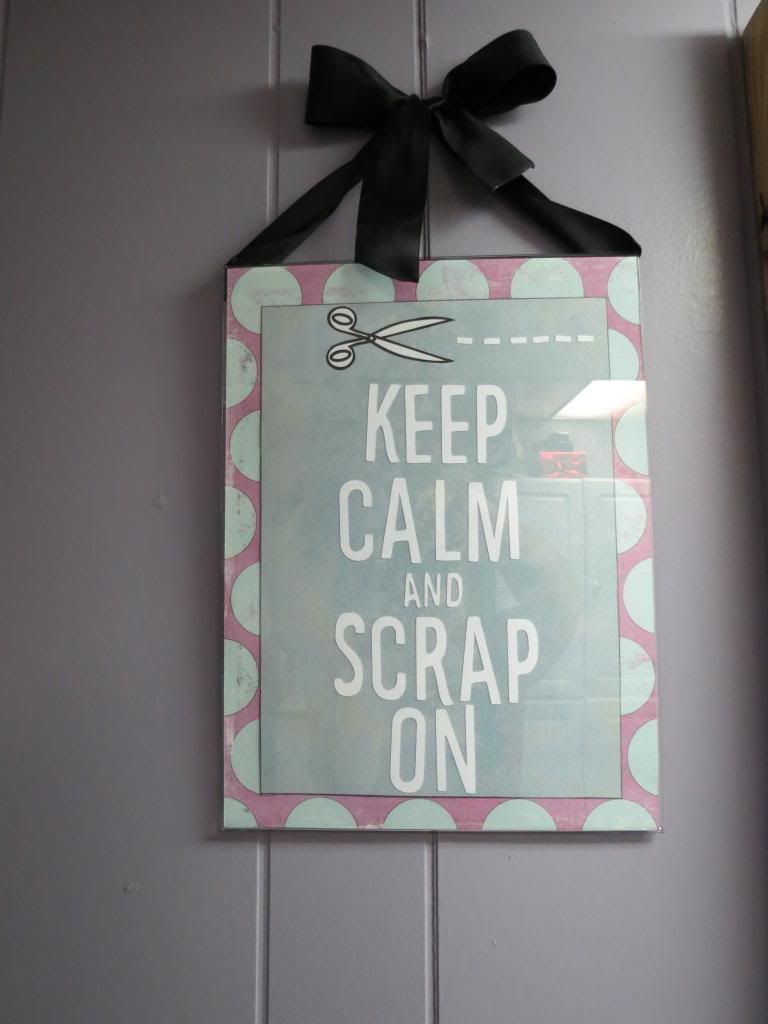
Next was this little sign made with scrapbook paper, letters cut on the Cricut, another clear acrylic frame and some thick black satin ribbon.  I love that "Keep Calm And Carry On" saying and variations of it.  I knew I wanted to use it for my craft room and this was perfect.

These items flank the peg board my husband installed above my desk last year.  It feels so much more like "me" in there with just these few simple items.

-Andrea


Wednesday, December 5, 2012

Christmas Crafts Have Begun

I am not a big fan of Christmas decor.  Probably because it requires me to take it out and put it away all within 5 weeks of time.  That just seems like a lot of work.  Also, the stuff I see at stores is typically too commercial and not really that cute.  This year I decided to make a few new things for our Christmas decor collection.  I think the homemade touch will be just the motivation I need to get it out each year.

Here is a paper tree I made inspired by Pinterest, although I have seen these in scrapbooking magazines long before Pinterest became a part of my daily life.  I used a MME mini pad of double sided Christmas papers to make this.  Now that I look at it, I think it needs a little star on top.  I'll have to get to that ASAP.

This is a little framed sign I made using my Cricut.  I have seen various printables with this saying on it for Christmas, but I thought it would be richer if I cut the words out instead of just printing the whole thing off on the printer.  I used the Christmas Village cartridge (it was a free cuts of the week) to make the wise man and the camel.
I have a few more things in the works and will share them as soon as they are finished.  I hope everyone is enjoying the Christmas season!

Andrea


Saturday, November 17, 2012

Thanksgiving Wreath

I created a Thanksgiving wreath to hang on our front door.  I'm not sure what I put there in years past, but I thought we could use something specific to Thanksgiving since we host the big turkey dinner.  I found the idea on Pinterest of course and couldn't wait to make one of my own.  Here it is proudly hanging on our front door.

It was not that difficult of a project.  However, it has a few elements to tackle, so it did take some time.  I did it over the course of a few days though.  The wreath had to be covered in burlap, the turkey had to be created, the banner had to be made and the felt flowers had to be created as well.  I am pleased with how it turned out!

Andrea